Spraying is a great way to produce a professional-looking finish. You could use a traditional spray gun that’s fed air from a compressor, but be prepared to fill the air around you with overspray (finish that goes in the air instead of onto your project). There’s a better way. A high-volume, low-pressure (HVLP) sprayer provides much better transfer efficiency, putting nearly all of the finish on the project, and as a result creates little overspray. That means less mess, healthier air, and more-efficient use of your spraying material. Today’s better HVLP units put down a finish as smooth as any you’ll get using a traditional spray gun.
Before You Start
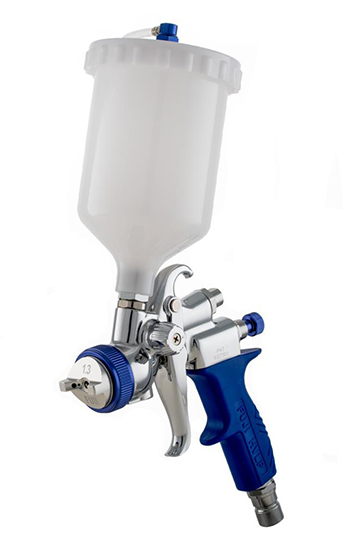
Step #1: Prepare the finish. Read your sprayer’s manual to determine if the finish you are using needs to be thinned before pouring it into the cup.
Step #2: Adjust the spray pattern. Turn the air cap to produce a horizontal, vertical, or circular spray pattern. The horizontal spray is usually best for vertical surfaces. For tops and other horizontal surfaces, use the vertical setting. The circular pattern can be used to spray any type of surface. It’s a good practice to test the patterns on a scrap piece before spraying your good workpiece.
Step#3: Adjust the flow. The flow-adjustment knob will set the volume of finish that’s sprayed. Turn on the turbine, hold the gun’s nozzle about eight inches from a scrap piece, and pull the trigger. If you see drips and pools, turn the adjustment knob clockwise to decrease the flow. If the coat is too thin, turn the adjustment knob counterclockwise to increase the flow. You can change the size of the spray pattern by moving closer or further from the workpiece. But, remember when you change the distance between the nozzle and workpiece, it could throw off your flow adjustments.
Protect yourself
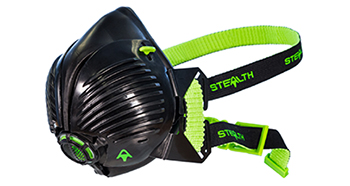
When spraying always wear safety equipment: goggles, nitrile gloves, and a respirator. You do not want to risk exposure to finishes. In the short term, exposure can irritate your eyes, skin, and throat. Much more severe effects can be caused with long-term exposure. Exhaust fumes in a way that complies with local regulations.
Three spraying techniques for top-notch results
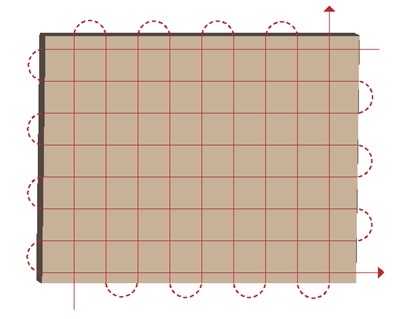
Technique #1: Apply light and even coats. Start at one corner and make a series of overlapping passes until you end up at the opposite corner. Make the first series of passes run across the grain of the wood. Then, make another set of passes parallel to the grain. Hold the gun perpendicular to the workpiece and keep it moving at all times. Release the trigger each time you pass off the edge of the wood and depress it again before passing back over.
Technique #2: Use a straight arm. Hold your arm straight to maintain a uniform distance between the nozzle and workpiece. Always work in straight lines.
Technique #3: Raise your work. Get your project up off the surface it’s sitting on. You can simply prop it up on wood blocks. Or, rest it on the points of nails driven through wood pieces. Placing a large and heavy project on a dolly with casters is a great way to move it around while applying the finish.
Keep your spray equipment clean
Thoroughly clean the fluid cup and gun after each use. First, pour out any remaining finish from the cup. (Use proper storage or disposal methods.) Then, pour a small amount of solvent into the cup, attach it to the gun, and spray the solvent into an empty can. Repeat this step until the solvent comes out clean. Follow your HVLP spray system’s manual for further dismantling and cleaning instructions..
View more Tool Tips